Friday, April 29, 2016

Exercise...not so blah


So Facebook has this thing where your "memories" pop up. It's a helpful thing, because somedays I don't remember what I did an hour ago, let alone what happened 3 years ago.   Turns out I wrote a blog post about Exercise 3 years ago today.  Since it popped up & I haven't written a post in a REALLY long time, I thought I would revisit this topic.  Let's see how things have changed.

I started going to bootcamp classes at LiveFit Studio July 1, 2014.  People had asked me before to go with them I was too scared!  Bootcamp sounds so scary!  My sister-in-law started going & loved it, so I decided to tag along.  I've been going 3 times a week ever since! Turns out it's not so scary.

So, yes, getting in the habit is hard.  But you have to find something you enjoy doing & it won't be so hard to make the habit & go! A workout buddy helps too!!

Now I pin inspirational stuff on my Exercise Pinterest page and help post stuff on the LiveFit page. 

But no more pinning exercises. Let's face it, I'm not a workout at home kind of girl.  I gotta get out the door & pay someone to torture me somewhere else.  Otherwise I'm just going to sit on my couch and pin stuff on all my other Pinterest boards.

Let me update the reasons I gave as to why I didn't exercise:

1.  Sweating.  Ok, seriously, still not a fan.  BUT it is strangely satisfying to know you worked that hard. It's evidence that you really did workout.  And although they tell you it doesn't, it seems like the more you sweat, the more calories you burned.  Just a note: I do really enjoy the studio classes with the fans on :)

2.  If I went to a gym, I would still think it was boring.  But the classes I go to are never boring and I've never had the same class twice.  They mix it up every time.  Like I said, find something you like & you will do it.

3.  I have the time.  When I started, I went to 5am classes.  People said I was crazy. Now, I don't have to go that early, but I would if I needed to.  

4.  Ok, I ran a half marathon.  Still not a fan of running.  I can do it, but not my favorite.  Like everything else, it's so much better with a buddy!!!

The Jillian Video.  Yeah, that was the only time I did that thing.  (Hope no one held their breath thinking I would let Jillian yell at me again. Or run that week...)
Now I have my LiveFit instructors who push me in a nice way.  They don't let us give up and some of them even let me gripe and complain.  I usually do whine some and mumble/groan when they tell us to do burpees (devil) or high knees (just hate them), but I do them anyway.

So here's the thing. I never thought I could or would do this.  I always wanted to be in better shape, but spent many years making excuses & just not doing it.  Now I can't imagine not doing it.  I'm stronger. I wear shorts & tank tops. I'm looking forward to the beach & summer time.  I have done things I NEVER thought I would do including running the half marathon and an 8K Battlefrog Obstacle Course race (so much fun!!).  I can even do a Yoga headstand!

So thank you FB memories.   I've come a long way.


Click on the pic above to read my Shred & Share story. 
If you are in the area, come to a class with me!!


Can you see me in this pic? Love our LiveFit family.


Exercise....blah

Getting in the habit of exercising is hard.  We did not grow up in a family who thought exercise was important. I would like that to be different for my kids, but it's SO hard!
I pin exercise stuff on Pinterest, but I don't do it.

Here's why...
1. I don't like to sweat. That is why there is a fan that I stood in front of today.
2. It's boring. I bought an elliptical & put it in our room.  I figured I could watch How I Met Your Mother reruns and do the elliptical for 30 minutes.  BORING!!  I resold the used boring machine quickly.
3. I can't use the "I don't have time excuse". I have time, I would just rather do other things.
4. We enjoyed running...but it's easy to make excuses. Mostly--it's too cold or too hot.

Last weekend, my sister & I found some Jillian Michaels DVDs at a yard sale for $1!  She took the regular "Shred" DVD & I took the one that incorporated weights. 
I tried it today.


Now I kinda knew what to expect.  I watch the Biggest Loser, I've seen Jillian in action. I've heard other people's experiences of trying her DVDs. But I did it anyway.

It started out great. At 7 minutes in, I was thinking "Jillian is not bad at all!" I can do this!  Yeah...that was just the warm up.... At 14 minutes in I paused it to get a drink.  I also mumbled to Jillian about how she sucks.  Even at this point, I'm still thinking she isn't that bad.  She wasn't yelling, it was just hard because I'm not in shape & I hate exercising. 

At 20 minutes the DVD froze.  A sign I should quit!! :) But I didn't (yet). I ejected, cleaned it off & put the mean woman back in the DVD player. THEN she started getting louder! 
Ahhh...the Biggest Loser Jillian had shown up. AND she was trying to get me to do something called a Turkish Get-up.
I mumbled an "Uh, No" and got another drink of water while she finished her get-ups.

She didn't have much time to be mean, though. Time for cool down.  Thank goodness!!

By then, she's trying to be all sugary sweet.  Woman, please! You were just yelling and I know how  you treat those BL contestants, you can't do sugary. 
"Are you feeling Awesome? Well you should because you are Awesome!"  Big fat smile. PUHLEEZE!

I know it was my first day. I did enjoy the weight part, even if I was scared I would let go & it would hit the TV. 

I think tomorrow I will do the Pilates DVD tomorrow.
It hurts but she's nice.

MAYBE, just maybe,  I will try Jillian again on Wednesday. Maybe, we will actually start running again like we keep talking about...
But like I said, I'm horrible at exercising so no one hold your breath about it. 

Sunday, July 20, 2014

Chalk Painted Table

In the office at school, there is an ugly black box that sits on the floor right by the secretaries desk.  She & I do not like the ugly box, but there is nothing we can do about it...it has to stay. So we've been trying to find a table or something to put over it to hide it.

I bought this table from my neighbor for $25.


This picture was taken after I had already started my painting process.  I pinned a post on Pinterest about making your own chalk paint & I decided to try it on this table. 
(Find post here)

I painted parts of the edges with a brown acrylic paint.  Then I used left over paint from when we he had our living room painted.  I used her recipe for making chalk paint by mixing the paint I had with Plaster of Paris.

Here is what the table looks like now!


I think it turned out great!  I painted the table with 2 coats & let it dry overnight. Distressed the edges & applied a coat of wax.  To hide the ugly box, I bought a sheet of thin wood (1/4 inch, I think), cut it to fit the space and covered in burlap.

It was fairly easy and I'm happy with the finished product.  Can't wait to take it to school & hide the ugly box!


Saturday, June 7, 2014

A Frozen Birthday

Savannah turned 6 this week!!

We try to only have big, friend-invited birthday parties every other year. So this year was a family party year.  We celebrated at home with a Frozen themed party.

The day turned out great, despite a near Pinterest fail with the Olaf cupcake cake.
It turned out ok.  The birthday girl said, "It looks great because you are my mommy!"


We had Anna & Elsa's chocolate dip.


Kristoff's Ice Blocks


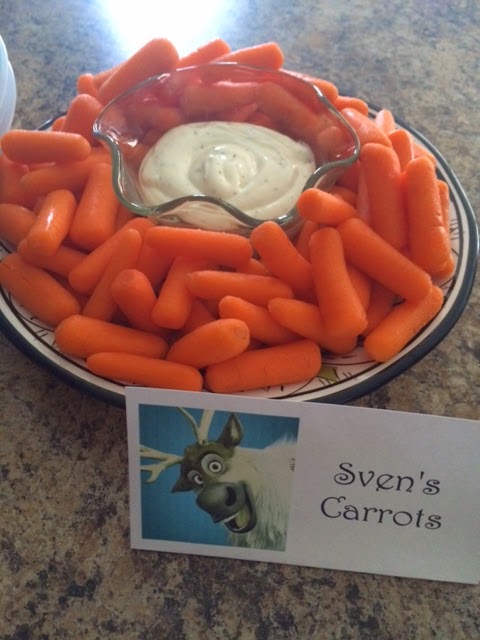
Sven's Carrots


Olaf's Noses


I made Olaf cups out of Styrofoam cups and filled them with candy for party favors and made little snowmen faces with powdered donuts and Mike & Ike candy.


She enjoyed her party day!


It was an easy party (other than the Olaf cupcake cake fiasco...just buy black icing. As my sister said, "don't ask Missy if she wants to build a snowman")

Overall, a success.  The kids were able to swim and play while the adults got to socialize. 
A good time celebrating our girl!


Here are a few more pics from her actual birthday.

I new iPod & case.


Birthday donuts from daddy :)


Her present from Landon.


Enjoying Yogurt Mountain after dinner.


She's such a blessing!!


Friday, May 30, 2014

Summer Fun 2014--Kid Blogs

My kids started blogs today.  In 4th grade, Landon will be making up & typing stories for part of his grade.  They wrote some in 3rd grade & he wrote some really creative & funny stuff!

Part of my goal this summer is to get him more comfortable with typing.  They did some in 2nd grade and since it was timed tests, it was excruciating! (We discovered recently he has processing issues--basically don't time the kid on things. So timed typing tests--not fun!)

So, he started a blog. Unwillingly, of course, because anything Landon doesn't want to do, we butt heads on. But by the time he was done, he decided it was fun. He enjoyed changing the fonts & styles & adding pictures.

Hopefully, he will write a post everyday or so and it will help get him ready for typing stories in 4th grade.


Here is a link to his blog: Lando's Blog

Since Savannah loves to learn and do all things her brother does, she wanted to write a blog too.


Notice how she's trying to type for real, not just finger poke the letters! :)  Here is a link to her blog, I promise she really did write & type this all herself.  Savy's Blog

I feel we have a lot of things to do this summer to get ready for 4th grade.  My goal is to make it fun, but make some progress.
Praying these blogs will be part of that fun!!


Wednesday, May 28, 2014

Summer Fun 2014--Slime

Summer Fun 2014
We made Slime!!

Well it's been awhile since I've written a post.  This school year absolutely FLEW by and here we are at summer break.

My goal is to make some fun stuff and do some learning this summer.  We need to work hard to make sure we are ready for 4th & 1st grades!

For our first project, we made slime.  There are a ton of slime recipes on Pinterest. I used this Pin for our recipe. 
Basically, it's glue & liquid starch with some food coloring thrown in.  Her post also shows how to turn it into Gak and blow bubbles!!

Landon wanted to keep it slimy so we may attempt the Gak bubbles another time.


Honestly, I wasn't sure either of my kids would really want to play with slime...that's just how they are. I was right about one...and pleasantly surprised at how much Landon loved it!

I used Target brand school glue that I had found on clearance at some point.  I found the liquid starch at Kroger.


I emptied the whole bottle of glue then mixed in the starch 1/4 of a cup at a time. I think we put a little more than 3/4 cup to the 1 bottle of glue.


We added a little more starch to get it a good consistency that didn't stick to your fingers too much.


I had added the food coloring to the glue before starting to add the starch.  Then Landon decided it wanted it orange so we added red later.  I really think you could add color at any stage of mixing because the red mixed in fine to make the orange.


Fun stuff!!  We played for awhile then put it in a baggie to play with another day.


Super easy & inexpensive!  The starch cost $3.50 & we used less than a cup of it.  We had the glue & food coloring, but if you had to buy, they are cheap too. Make some & enjoy!!


Tuesday, February 11, 2014

Valentines!!!

Valentines!

I have not written a blog post in awhile!! Sorry, time just gets away.  Thought I would share the valentines the kids are handing out to their friends and teachers this year.

I pinned several ideas on Pinterest and let the kids decide what they wanted to do.

For Savannah, we did the same thing we did last year.


I made a design in an Excel document and printed 4 on a page. The top says "Have a KOOL Valentine's Day". The bottom says "Love" with 2 hearts and a place for her to write her name. 
The middle is blank to attach a package of Kool-aid. We taped that in the middle, glued a piece of color card stock on the back, put that in a clear bag with a twisty straw and there you go!! I got the idea from this pin. She has a free printable you can use. It was easy to make my own too.

Cost: (made 18 valentines)
$3 for 3 packs of 6 twisty straws
$3.60 for 18 packs of Kool-aid
$1 for pack of 25 clear bags
I think, if I can still do math, that comes to less than 50 cents for each one.

Simple & easy and since no one from her preschool is at her current school it was easy to use the same idea :).

For Landon, we went for a Mustache theme.  We liked this idea found here, but I knew he would not like "I Mustache ask you to be my Valentine". So I combined that idea of a cut-out mustache and sucker with this idea with a different saying and came up with this.


I printed a picture of a mustache and used it as a template to cut 18 mustaches out of black foam pieces. 
I made the card in Excel and printed on card stock. (4 on a page)
Punched a hole in the mustache and put it on the sucker. Punched a hole in the card, stuck the sucker stick through the card and taped the stick to the back of the card.

Who doesn't want to eat a sucker & have it look like you have a giant black mustache?

Cost: (made 18 valentines)
$2 for 2 bags of blow-pops
89 cents for a piece of 12x18 black foam
Something like 20 cents per card.

Fun & easy to make!

Teacher gifts. Found the idea on Pinterest, but the link goes no where. A box of brownie mix with a spatula.


The tag says "Shooting for Brownie Points".

Savannah also has 5th grade friends. Had to make them a happy too.  Bought small water bottles at Hobby Lobby for $2 each. Stuck a pack of M&Ms in each one, then cut their initial out of vinyl to personalize them.
Googled "M" adjectives to make different M&M tags like:
Thanks for being a Magnificent and Magical 5th grade friend.
(Savannah picked Magical :)


Didn't they turn out cute?!?!?!

We are excited for Friday!


Wednesday, December 11, 2013

Snowman Crafts--4 different ornaments

Snowman Class
Tealight ornament, Lightbulb ornament and 2 salt dough ornaments

For Day 5 & final week of our Snowman class we made 4 different ornaments.

I made 2 batches of this salt dough recipe. (This was more than enough dough to make 12 ornaments of each kind.) Rolled the dough out and used a biscuit cutter to cut circles for snowman face ornaments (also found in the link above) and full snowmen using a cookie cutter. For the noses on the circle faces, I cut triangles with a plastic knife and formed them with my hands to shape I wanted.
Baked according to directions and let dry for a little over a day.
The kids painted and used sharpies to decorate them in class!


For the tea light ornaments, I glued a small, looped piece of twine on the back prior to class so they can be hung on the tree. I also cut several hats out of foam pieces.
In class the kids decorated the hats with markers and glued them on. They drew their faces on with sharpies. We twisted a pipe cleaner around the light for a scarf.


For the light bulb ornaments, I sprayed them with glitter prior to class.  Make sure you buy white bulbs not clear ones.  The kids picked pipe cleaners for the scarf and the hanger.  We twisted the pipe cleaners in place, then the kids used sharpies to draw on the faces.  We used a small orange triangle cut from foam for the nose. We glued black sequins on for buttons.

These were all fun & easy.  Here is a picture of my 2 demo ornaments that I made. :)


This was such a fun class!!  I forgot that in week 4 I printed this poem for the kids.  There is a black & white version so I printed and they colored it in.  Find it here.


Tuesday, December 10, 2013

Snowman Crafts--Wooden Snowman & Bottle cap Ornament

Snowman Crafts
4x4 Snowman & Bottle cap Ornament

The 4th week, we made snowmen out of a piece of 4x4 and and ornament using bottle caps.

I bought a 10 foot long 4x4 board from Lowes and asked my brother-in-law to cut it into six 12 inch pieces and six 8 inch pieces. The younger siblings & kids made the smaller size and the older siblings/kids made the bigger size.


I painted the wooden pieces prior to class to save time.
We used adult size fuzzy gloves from the Dollar Tree for the hats.  We put a Kroger plastic bag in the glove to help puff it up a bit, then tied a piece of string around the finger holes to make it look like a hat.

I had scraps of fleece that I cut into strips for the scarves. I purchased a pack of bells at the Dollar Tree to tie on the scarves. I found a pack of wooden oval pieces at Hobby Lobby that I painted orange for the noses.

The kids picked buttons and a nose to glue on and used Sharpies to decorate the face.  Some decided their snowmen needed hair and other accessories so they went to town with the Sharpies making the Snowmen their own creations.

I found the idea of using a 4x4 from and Etsy shop and used this tutorial for the glove hat idea.

For the ornament, I had Kevin save his beer bottle lids for several weeks. I spray painted them white to cover all the labels and sprayed them with glitter spray just for fun.

I painted Popsicle sticks navy blue, sprayed them with glitter spray and glued a looped string on the back for a hanger.

The kids decorated 2 out of 3 bottle caps for their snowman ornament.  One with a face & the middle with button.  We used Sharpies to do this.
Then they glued the bottle caps onto the Popsicle sticks and the ornament was done!!

Saturday, December 7, 2013

Snowman Crafts--Candy Dish & Burlap Ornament

Snowman Crafts
Snowman Candy Dish & Burlap Ornament

For the 3rd week of class, we made Candy dishes and a burlap ornament. 

There are several different pins on Pinterest for candy dishes made from small clay pots & glass bowls.  I pinned a couple and this is the best one.

Here are the ones we made.


I bought 4 inch clay pots and saucers at Lowes & Home Depot for 79 cents each.
To help class go smoothly and avoid sending home too much wet paint, I painted all the pots & saucers before class.  The pots took 3-4 coats of white spray paint. If I ever make these again, I would use a sealer on the pots first OR use a different brand of spray paint. I used the 97 cents Wal-mart stuff.
For the saucers, I painted half of them red and half black. They took 3 coats of paint. I had 3 sets of siblings in class, so I painted them different colors so the families would have slightly different ones.
I bought a bag of 12 wooden balls at Hobby Lobby for the lids. They are flat on one side and glued them on prior to class with E-6000 glue. I painted them white before gluing them on.

I cut scarves out of sheets of felt and eyes, nose, mouth and buttons out of vinyl.
The glass bowls came from the Dollar Tree.  They have 2 sizes--this was the bigger size--I think it was 4.5 inches.

Once in class, the kids put their faces & buttons on the snowmen. I helped them tie the scarf around the pot, then we glued the glass bowl on using 5-6000 glue.

We had extra time after making our ornament, so I let them paint their lids to make them their own.  They were once again very creative and most ended up not black or red at all!!

We also made a burlap ornament. I got the idea from an Etsy shop pin. I bought a half yard of burlap and had more than enough to make 15 ornaments (extras just in case).
I made a snowman shape with my Silhouette machine and cut white card stock to glue to the burlap. I felt like it needed a backing since the kids would be gluing things on the burlap.
I used spray adhesive to glue the burlap & card stock together, then trimmed the burlap around the shape.

The kids painted faces, glued on buttons, tied a string round the neck for a scarf.  We taped small twigs on the back for arms.

Needless to say, both projects turned out Super Cute!!

Friday, December 6, 2013

Snowman Crafts--Ornaments & Q-tips paintings

Snowman Class
Q-tip Paintings, Clear-filled ornament & Thumbprint Ornament

For our 2nd class, we made 2 ornaments and a painting.


We started by finishing the Thumbprint ornaments. The first week, I painted each child's thumb & pressed it 3 times on a plain, blue ornament to make a snowman. Since we finished them week 2, they were obviously completely dry by then :).

I had a bunch of sharpies, laid them all out for the kids and let them decorate their snowmen.

Once again, they were all very creative!!  Some went wild, like Landon--who put 4 arms on one of his-- and other were sweet and made cute snowmen. 
You can't go wrong with art and it was fun to see them be creative and make it their own.

Next, we filled a clear ornament with small, white  Styrofoam balls.  I pre-filled plastic cups with the right amount of styrofoam and made small funnels out of paper for each child.
Styrofoam is static-y and goes everywhere!! If I had it to do over, I might use the packaged, shredded white paper stuff, but the ornaments turned out so cute with the foam balls, if you can stand the mess use them!!

I have a Silhouette cutter machine, so I cut eyes and mouth circles out of black vinyl and triangle noses out of orange vinyl.  This worked out great & was easy!! If you can't do vinyl or some kind of stickers, you could paint the face on the ornament.

We used pipe cleaners & pompoms as a earmuffs for the top. I pre-glued the pompoms to the pipe cleaners to save time.
The worst part was the kids having to hold the earmuffs on while the glue dried.  It just took sooooooooooo long...at least according to kids :).  We did figure out that if you wedged them into the plastic cups just right, the cup would hold it all together while the glue dried.


Last, we made Q-tip Snowmen paintings. (Once again, the kids made a demo at home to see how it went.)


Close-up of Landon's class painting.  The cutest thing was, that the youngest girl in class loved Landon's demo painting so much she wanted to do one just like it! (The small, squatty man above, left)


This one is mine--it was so fun to make!
Apparently, Savannah didn't want pictures taken of her projects or I just didn't take any...who knows.


These are so simple! I bought a pack of card stock at Michael's with several shades of blue, a pack of Q-tips and used acrylic paint I had on hand.

It really is fun to watch kids create & just see what comes out of their minds and onto paper.

All these were really easy projects.  Cost just depends on what you already have on hand to use.  You can buy pompoms and pipe cleaners at the Dollar Tree, so you can get supplies inexpensively!

(The pins I pinned for these ideas ended up being just pictures with no blogs or tutorials, or went to blogs, but I couldn't find an actual post about the picture. So can't give credit to anyone.)